# 学习SVG(九)裁剪和蒙版
# 裁剪
- 使用
clipPath元素创建裁剪区域。区域内的部分显示,区域外的隐藏。
  <clipPath id="rectClip">
    <rect x="100" y="100" width="100" height="90" fill="none" stroke="black"></rect>
    <circle cx="100" cy="260" r="60" fill="none"></circle>
    <path d="M100 50L150,50L100,20L40,60Z" fill="none"></path>
  </clipPath>

  <image x="0" y="0" width="300" height="370" xlink:href="1.jpg" opacity="0.2"></image>
  <image x="0" y="0" width="300" height="370" xlink:href="1.jpg" style="clip-path: url(#rectClip)"></image>
1
2
3
4
5
6
7
8
2
3
4
5
6
7
8
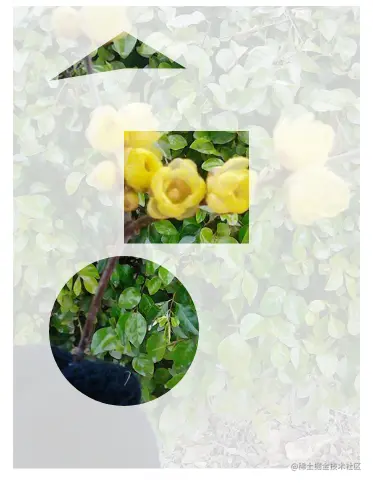
- 创建一个裁剪区域,在区域中绘制图形。并在需要裁剪的元素上使用
clip-path属性加载区域,就形成了裁剪效果。 - 这里为了效果更明显加载了两次图片,第一张添加透明度,第二张添加裁剪。能明显的看出第二张图片只展示了裁剪后的部分。
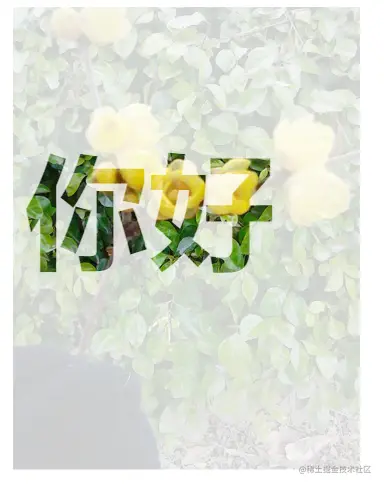
- 除了形状元素,文本元素也可用于裁剪。
      <defs>
        <clipPath id="rectClip">
          <text
            x="20"
            y="200"
            textLength="200"
            lengthAdjust="spacing"
            font-family="Vollkorn"
            font-size="100px"
            font-weight="700"
          >
            你好
          </text>
        </clipPath>
      </defs>

      <image x="0" y="0" width="300" height="370" xlink:href="1.jpg" opacity="0.2"></image>
      <image x="0" y="0" width="300" height="370" xlink:href="1.jpg" style="clip-path: url(#rectClip)"></image>
1
2
3
4
5
6
7
8
9
10
11
12
13
14
15
16
17
18
2
3
4
5
6
7
8
9
10
11
12
13
14
15
16
17
18
# clipPathUnits 属性
- 设置裁剪区域元素的数据格式。默认
userSpaceOnUse坐标系值。objectBoundingBox裁剪区域的百分比值。
<defs>
<clipPath id="rectClip" clipPathUnits="objectBoundingBox">
  <rect x=".10" y=".10" width=".40" height=".40" fill="none" stroke="black"></rect>
  <circle cx=".70" cy=".15" r=".09" fill="none"></circle>
</clipPath>
</defs>

<image x="0" y="0" width="300" height="370" xlink:href="1.jpg" opacity="0.2"></image>
<image x="0" y="0" width="300" height="370" xlink:href="1.jpg" style="clip-path: url(#rectClip)"></image>
1
2
3
4
5
6
7
8
9
2
3
4
5
6
7
8
9

- 和上面一样,只是值修改为百分比设置。
# 蒙版
- 使用
mask元素创建蒙版,通过x,y,width,height指定蒙版的尺寸。 maskUnits属性设置蒙版元素的格式。默认值objectBoungdingBox,百分比格式。值userSpaceOnUse,坐标格式。maskContenUnits属性设置蒙版内元素的格式。默认userSpaceOnUse,坐标格式。值objectBoungdingBox,门板对象的百分比格式。- 蒙版中*黑色代表不可见*(opacity: 0),*白色代表可见*(opacity: 100%)。
<defs>
<mask id="mask-rect" x=".2" y=".2" width=".8" height=".8">
  <rect x="50" y="50" width="100" height="100" fill="white"></rect>
  <rect width="50" height="50" fill="black" x="60" y="60"></rect>
</mask>
</defs>
<rect x="0" y="0" width="200" height="200" fill="#d4fcff"></rect>
<rect x="0" y="0" width="200" height="200" fill="#fcd3db" mask="url(#mask-rect)"></rect>
1
2
3
4
5
6
7
8
2
3
4
5
6
7
8

- 先创建红色前景和蓝色背景。
- 创建蒙版,为元素80%的大小。
- 添加图形元素并指定黑白颜色。白色蒙版可见展示红色背景,黑色不可见展示底层蓝色背景。
# 图片渐变
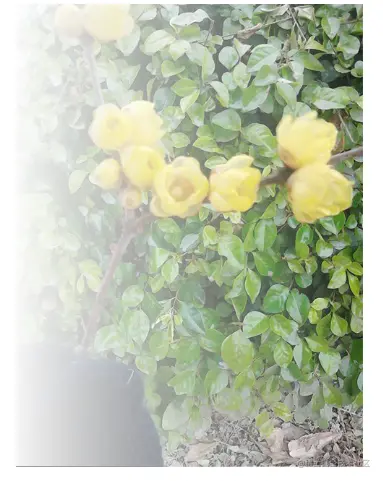
- 创建一个黑色到白色之间的线性渐变,盖在图片上实现图片渐变效果。
<defs>
<linearGradient id="whiteBlack">
  <stop offset="0" stop-color="white"></stop>
  <stop offset="100%" stop-color="black"></stop>
</linearGradient>
<mask id="mask-rect">
  <rect x="0" y="0" width="300" height="370" fill="url(#whiteBlack)"></rect>
</mask>
</defs>
<image x="0" y="0" width="300" height="370" xlink:href="1.jpg"></image>
<rect x="0" y="0" width="300" height="370" fill="white" mask="url(#mask-rect)"></rect>
1
2
3
4
5
6
7
8
9
10
11
2
3
4
5
6
7
8
9
10
11